This Kanban tutorial aims to walk you through your first Kanban steps. Starting from creating a board, following the instructions, you will learn how to visualize projects, break them down into tasks, optimize your workflow with WIP Limits and multiple swimlanes in Businessmap.
-
Audience: You are new to Kanban, and you want to learn how to set up your first project on our platform.
-
Prerequisite: You have an account.
-
Why Kanban: Achieve a new level of visibility into your projects by visualizing the process and the work.
Practicing Kanban requires visualizing work. Let’s start by creating your first Kanban board. 
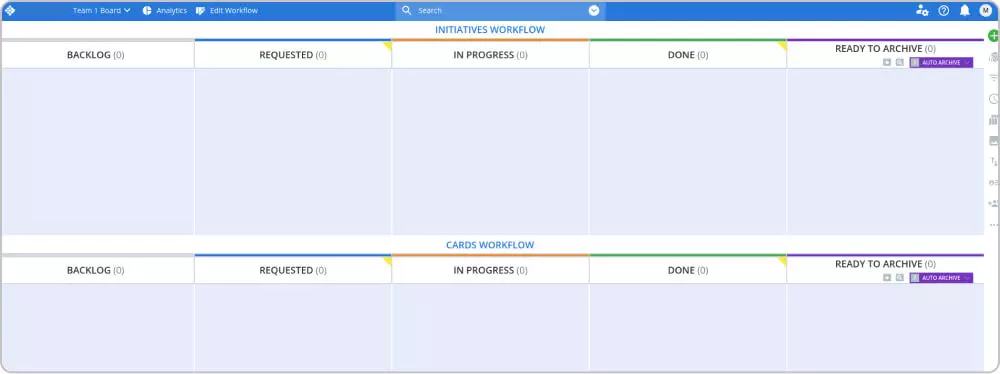
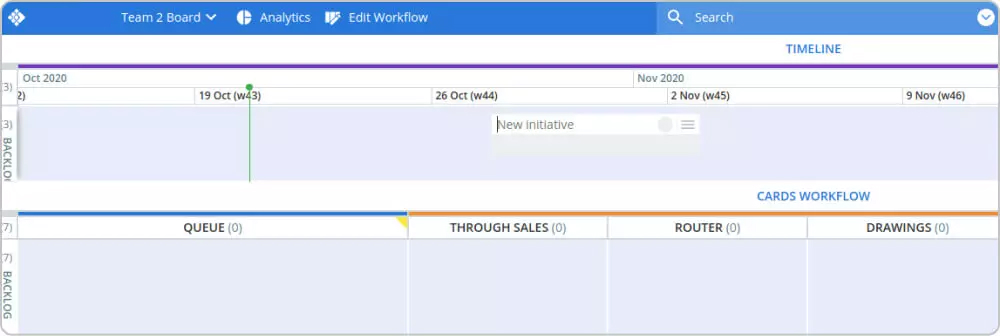
Here you will visualize your projects as Initiatives and the tasks related to them as Cards. The standard view of the board is “Backlog”, “Requested”, “In Progress”, “Done” and “Ready to Archive”.Each of these columns represents a stage of your work process and simultaneously signals your work items' status. For example, when you see the cards in the “Requested” column, you know which tasks are not started yet, and in the “Done” column, you see which tasks are finished.
Step 1. Visualize Your Workflow on a Kanban Board
Kanban focuses on optimizing the flow of work, so your next step is to configure your workflow as precisely as possible. By accessing the workflow editor in our product, you will be able to add and rename columns and visualize all your work stages on the board.
Tip: To make sure nothing slips your mind, write on a piece of paper all steps of your process. Then make a simple test with a few of your typical tasks and see if the stages you listed are all stages these tasks need to go through to be done.
The goal here is to create a visual representation of your work process so that you can start managing projects on your board. It is advisable to use column names that correctly describe the different stages of the workflow.
Ensure it is also clear when tasks are considered “done” and what happens with them after they exit your workflow.
Visualizing your process on a board will also help you quickly uncover problematic work stages and bottlenecks.
Step 2. Create a Project
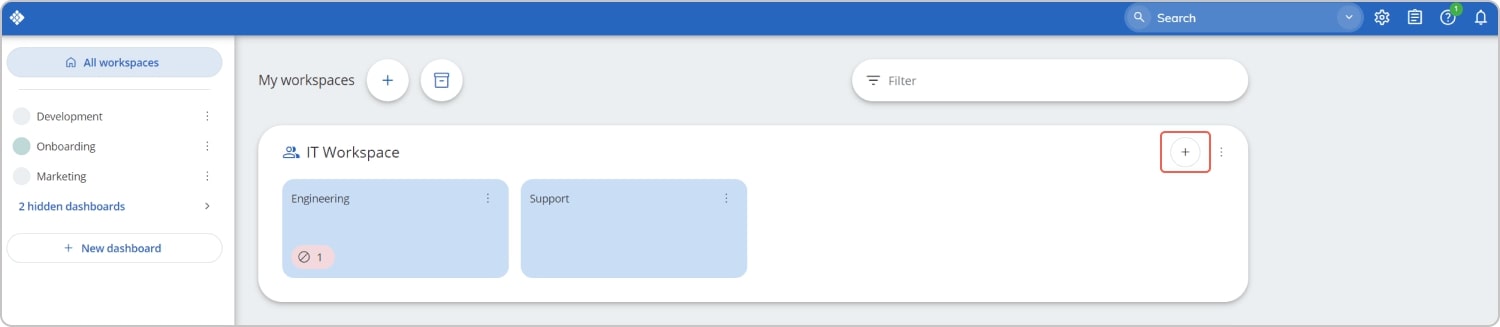
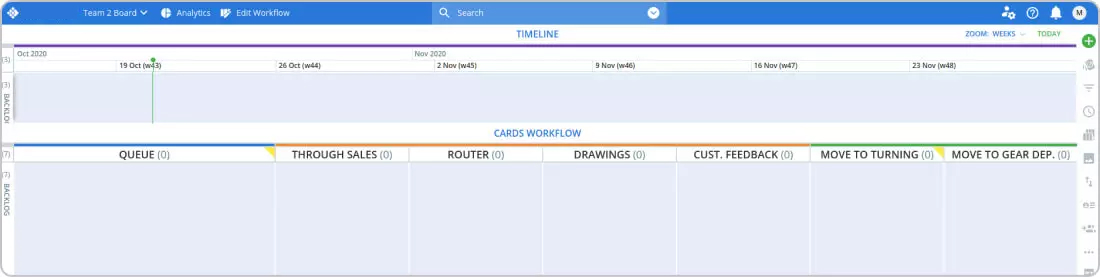
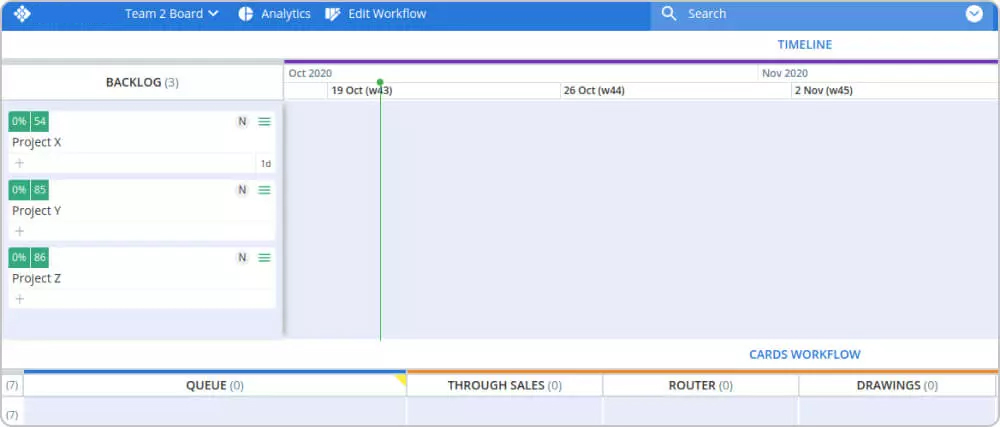
Your next step is to visualize your first project. To do so, you double-click on your timeline, and you create a new initiative card.
As the name suggests, the Timeline provides a visual picture of your past, current, and future initiatives in a calendar view so you can keep an eye on your projects' status in real-time.
It also offers a Backlog column, where you can create your projects and work on preparing their launch before moving them to a specific slot on your timeline.
The projects, represented by initiative cards, are best described as folders which collect all relevant information and project-related work.
Step 3. Visualize Project Tasks
Your next step is to break those projects into tasks in a manageable and trackable way.
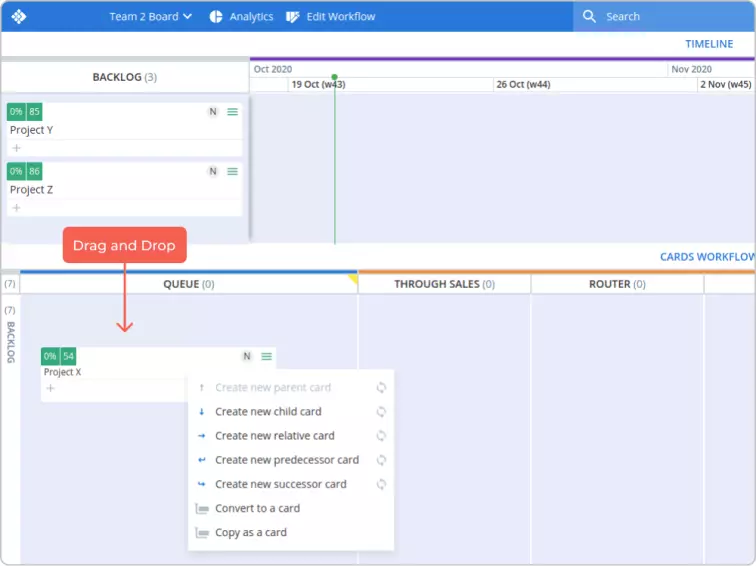
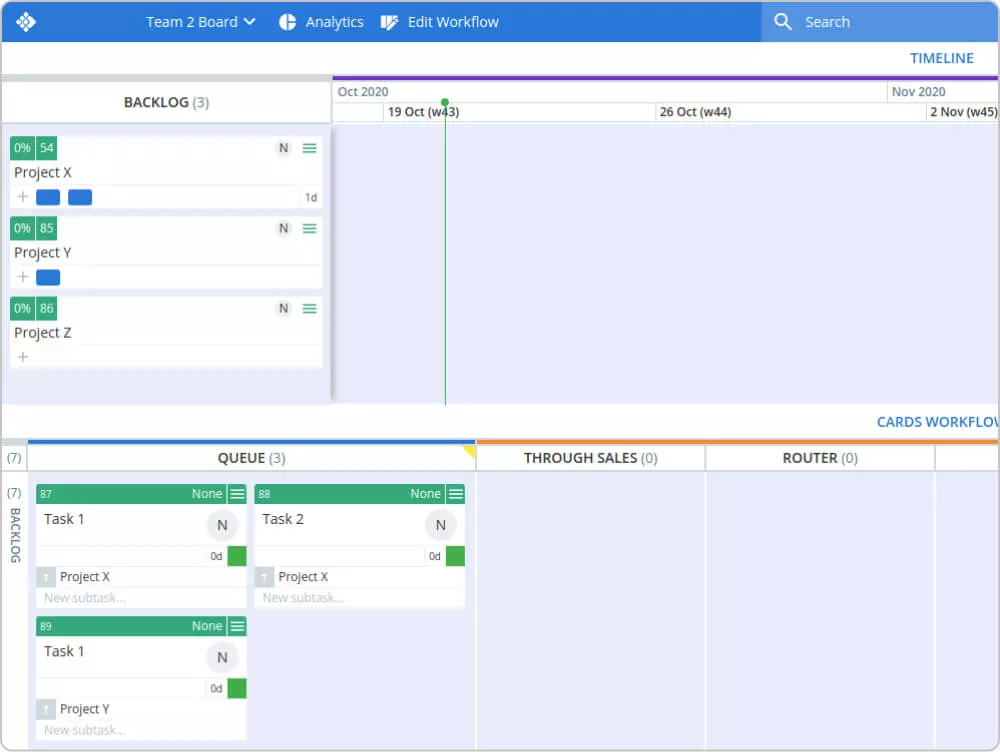
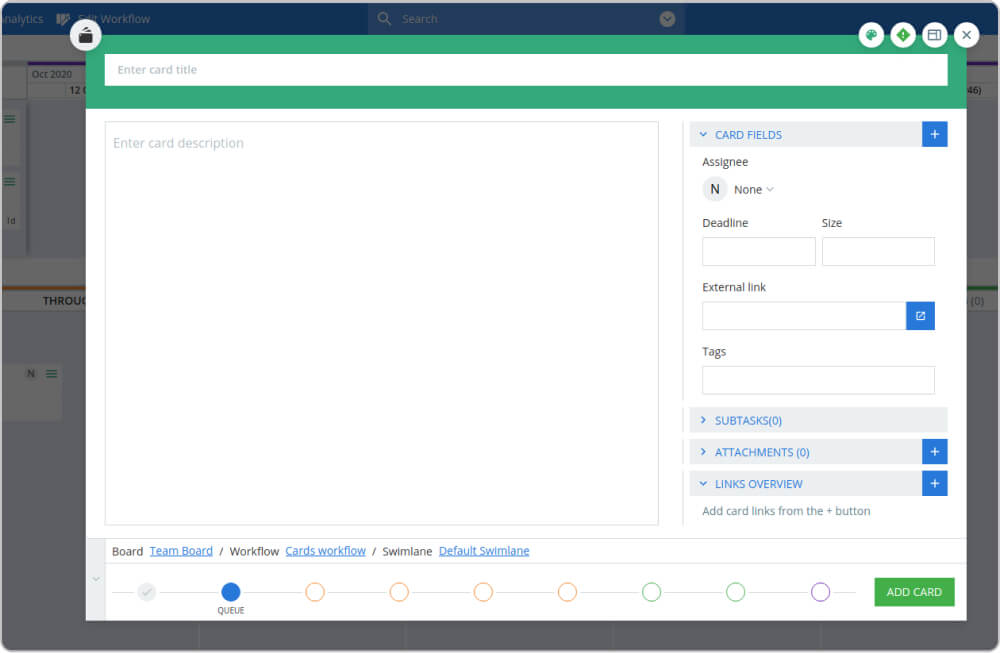
As previously mentioned, you will visualize your individual tasks through cards on your Kanban board. By simply dragging one of your initiatives over the “Cards Workflow” area of your board, Businessmap allows you to create individual cards automatically linked to the project.
We call these “child cards”. Having a parent-child connection between the project and its tasks enables a better overview of how many tasks a single project consists of and which of the cards on your board are related to “Project X,” for example.
In the Kanban card, you can add information about the tasks, link relevant documents, set a deadline (if there is such), and so on. Make sure to provide all the needed information so any team member could start working on the task without asking numerous questions. This supports a high level of transparency and makes your team more efficient.
Tip: When breaking down your project into tasks, try to size the individual work items approximately the same. Kanban focuses on creating a smooth flow of work, and establishing a stable and predictable workflow is an essential step towards this. However, if your cards vary too much in size, some of them will need 2 days to be finished, and others 4-7 or 10, destabilizing your flow and making it hard to predict when things will be done.
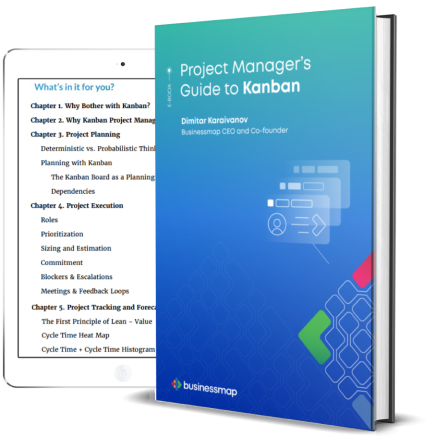
10 Years Kanban Experience In 1 Free Book.
Project Manager's Guide to Kanban
Step 4. Introduce WIP Limits to Optimize Flow
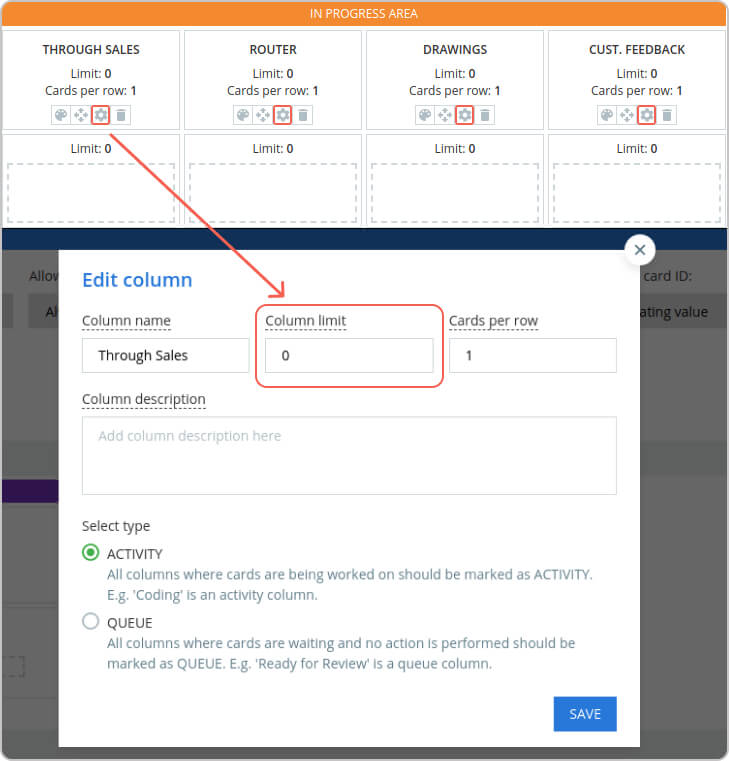
Talking about a predictable and stable workflow, next, you should introduce Work-In-Progress limits on the different stages of your workflow. This means restricting the maximum number of cards that should be in a particular column simultaneously.
To do so, go back to the “Workflow Editor” and adjust your column limits.
Introducing such workflow policies ensures incoming requests do not swamp your team, and only a manageable number of tasks are simultaneously in progress.
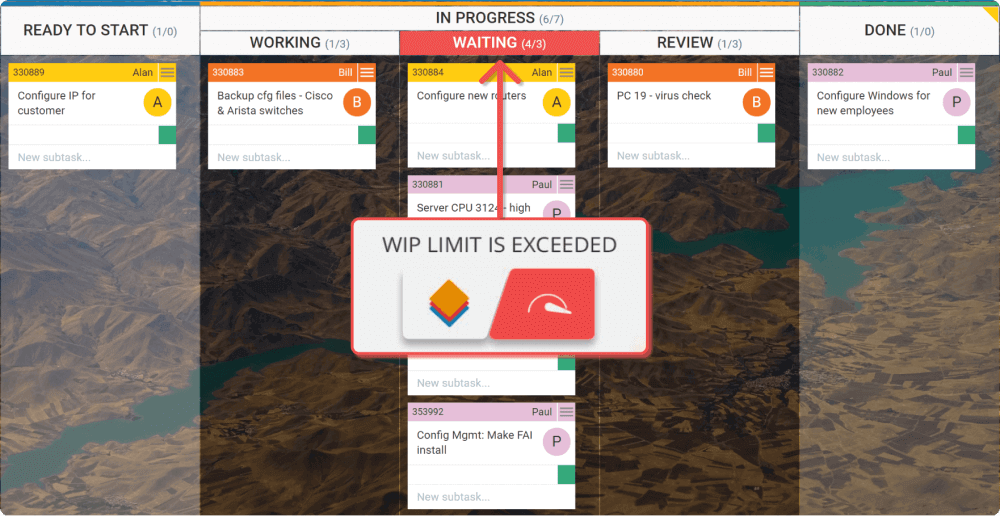
Tip: Setting up WIP limits, you might be wondering, “What is the right amount of tasks in progress?”. To figure this out, we suggest a simple calculation: WIP= x+1 with “x” being the number of people contributing to the particular cards workflow. In this case, with 3 people on your team, your WIP will be 4. If this seems too low for you, be honest, how many things can you really work on at the same time?
Setting WIP Limits ensures team members focus on finishing work items over continually starting new ones. Introducing such constraints establishes a process where people start new tasks only when there is available capacity. This helps reduce context switching and stabilizes the workflow.
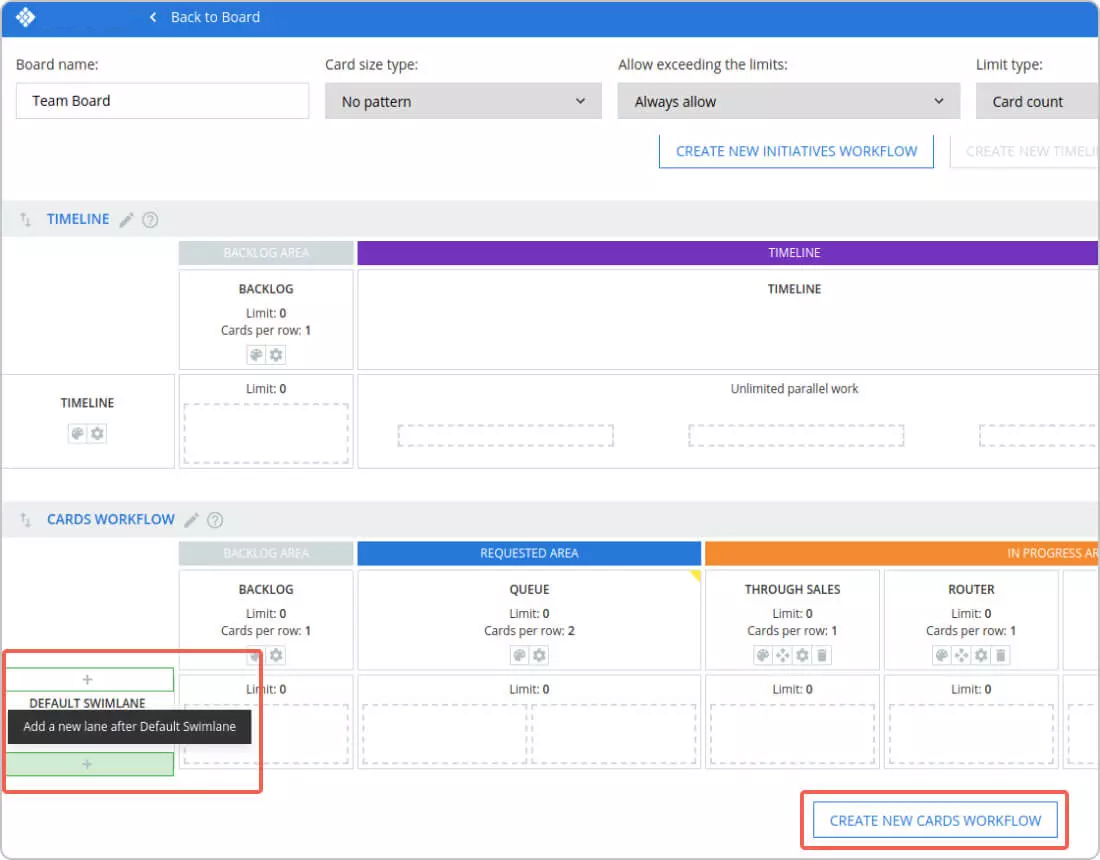
Step 5. Add Swimlanes and Multiple Workflows for Different Work Types
So far, you should have a Kanban board with a focus on finishing tasks instead of only starting new ones. To further optimize it, as next, we advise you to introduce additional swimlanes. Through them, you will be able to gain a better overview of all your work, organizing your cards into categories such as different work types, clients, or classes of service.
Going to your “Workflow Editor,” you can add new swimlanes to your board.
How exactly you should structure your board and what will work best for you depends on your work's specifics. However, an established best practice is to have an “Expedite” swimlane for urgent requests. Еxpedite is the Kanban class of service of the highest importance. Such work items represent a massive risk for your project. To ensure they receive immediate attention, add a dedicated “Expedite” lane to your board and define what kind of tasks qualify as “expedite". Additionally, accept a process policy that tasks in this swimlane have the highest priority, and all resources should be channeled to resolve them as quickly as possible.
It would be best to further evolve your board by adding swimlanes or workflows to separate different activities, project types, or teams.
Tip: If you wonder whether you need an additional swimlane or a workflow, answer this simple question: Will the work process be different? If you want to separate a particular task type that takes longer but follows the same process, you should add a swimlane. If you're going to separate tasks that follow a different execution process, you need a new workflow.
The goal is to manage homogenous tasks in dedicated areas of your board for a better overview and improved workflow predictability.
Step 6. Prioritize Work in the Backlog
The last step from the Kanban tutorial for beginners focuses on your Backlog. If left unmanaged, this column can quickly turn into the messy backyard of your board. Although the Backlog is an “uncommitted” territory, you should still make sure to prioritize the cards there.
A best practice is to move the tasks with the highest priority to the top of the column. You can also use the card "priority sign" and assign priority to every single card. Both methods aim at better visibility and efficient prioritization of future tasks.
Following these six steps, you can now customize your board according to the needs of your work process (segment column, add swimlanes or workflows), visualize your projects and break them down to individual tasks. Additionally, you can support the stability of your workflow by applying WIP Limits and work prioritization.
Tip: It is advisable to combine these Kanban techniques with regular meetings like daily stand-ups, service delivery reviews, or another format, depending on your needs. This will help your team stay aligned, identify room for improvement, and exchange knowledge.
This tutorial hardly scratched the surface of what you can achieve with Kanban. Explore more Kanban board examples and remember - there is always room for improvement. We advise you to monitor your Kanban board and make small improvements regularly and constantly.
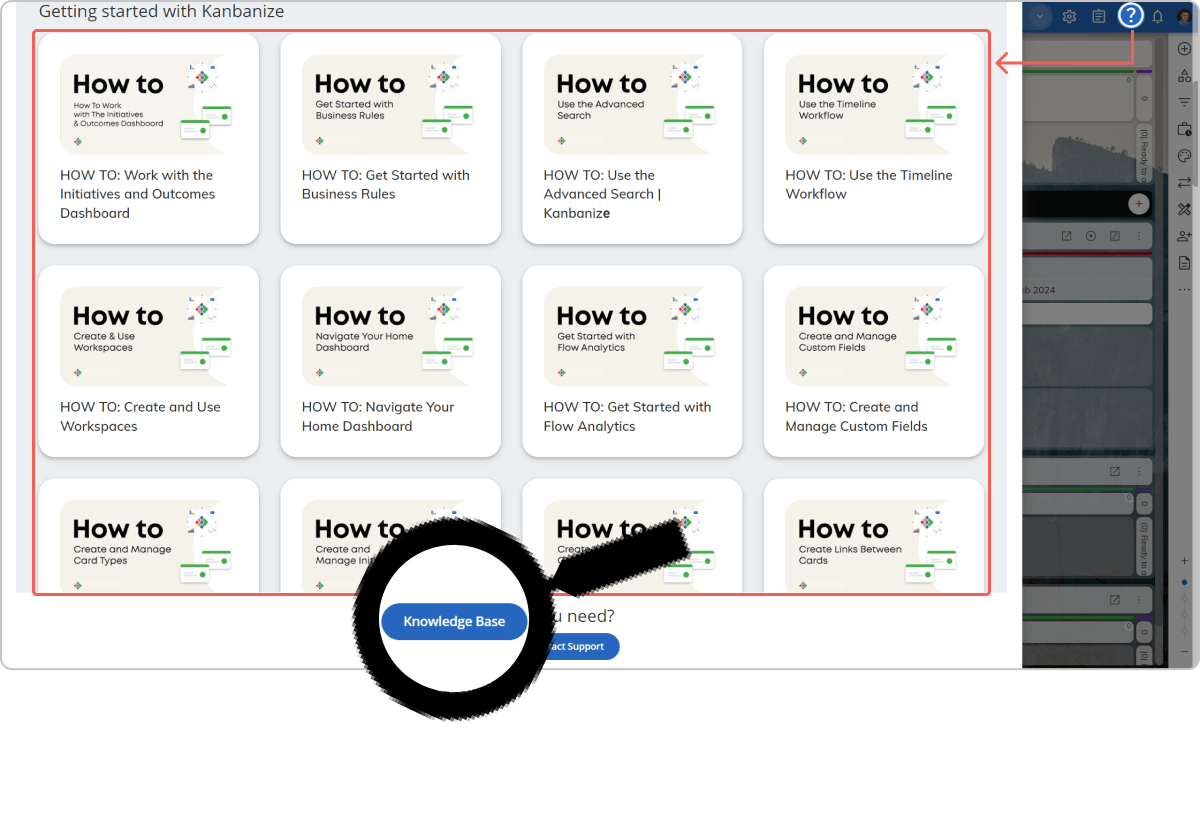
For more detailed information, you can access our knowledge base directly from your product account.
Our next tutorial will walk you through Kanban Analytics in Businessmap. Learn how to use the Kanban charts best and how reading them correctly will help you make better business decisions.
We offer the most flexible software platform
for outcome-driven enterprise agility.


 Each of these columns represents a stage of your work process and simultaneously signals your work items' status. For example, when you see the cards in the “Requested” column, you know which tasks are not started yet, and in the “Done” column, you see which tasks are finished.
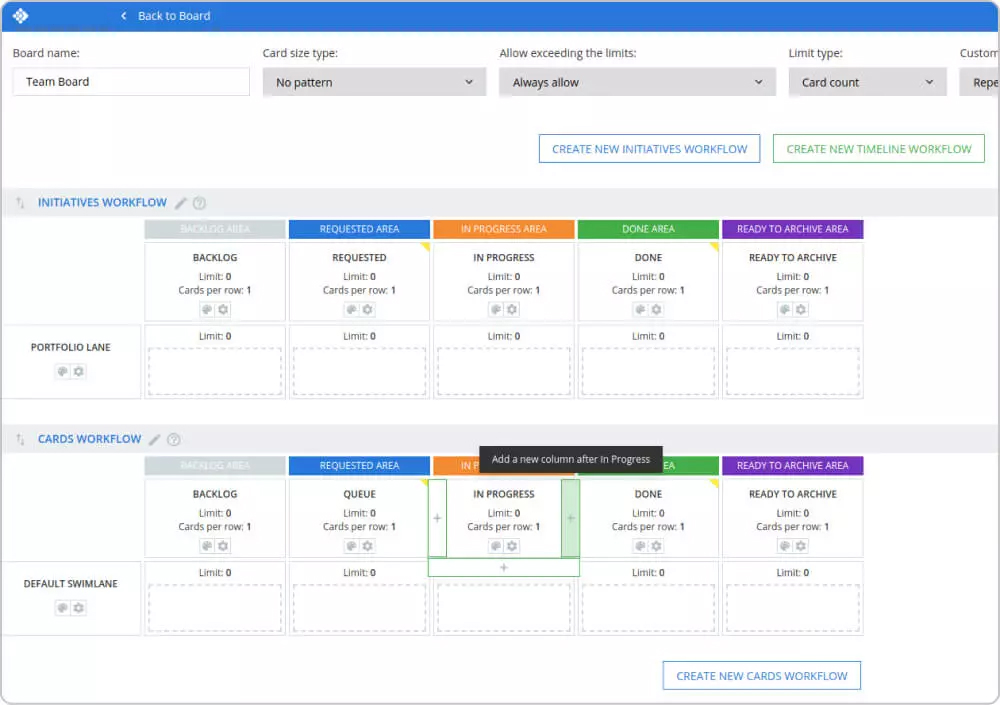
 Ensure it is also clear when tasks are considered “done” and what happens with them after they exit your workflow.
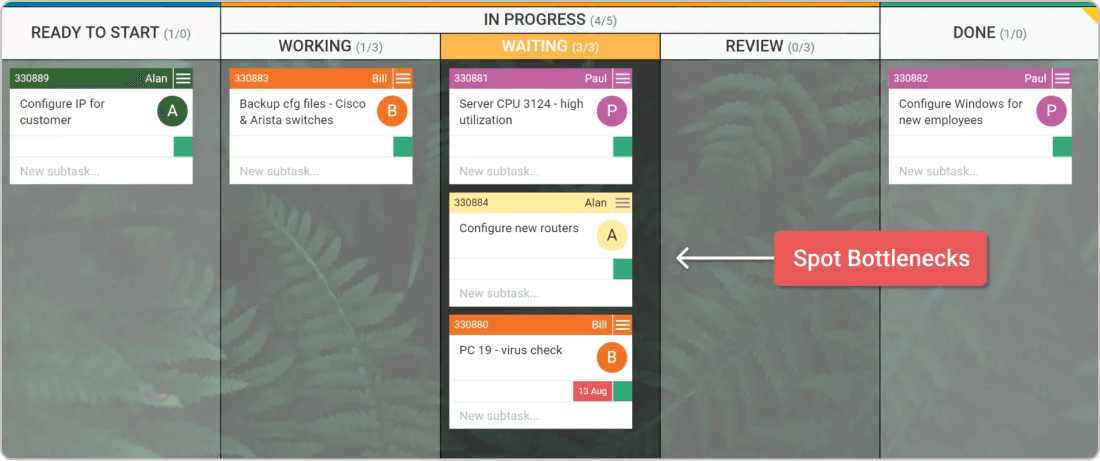
 How exactly you should structure your board and what will work best for you depends on your work's specifics. However, an established best practice is to have an “Expedite” swimlane for urgent requests. Еxpedite is the Kanban class of service of the highest importance. Such work items represent a massive risk for your project. To ensure they receive immediate attention, add a dedicated “Expedite” lane to your board and define what kind of tasks qualify as “expedite". Additionally, accept a process policy that tasks in this swimlane have the highest priority, and all resources should be channeled to resolve them as quickly as possible.
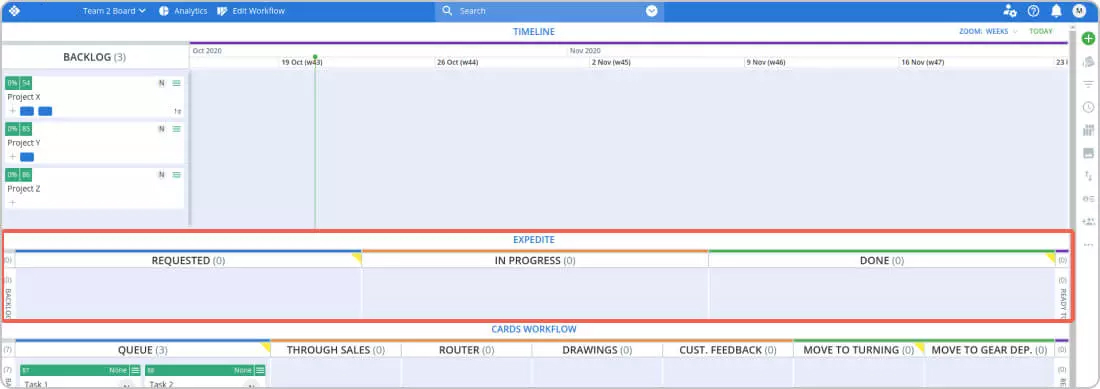 It would be best to further evolve your board by adding swimlanes or workflows to separate different activities, project types, or teams.
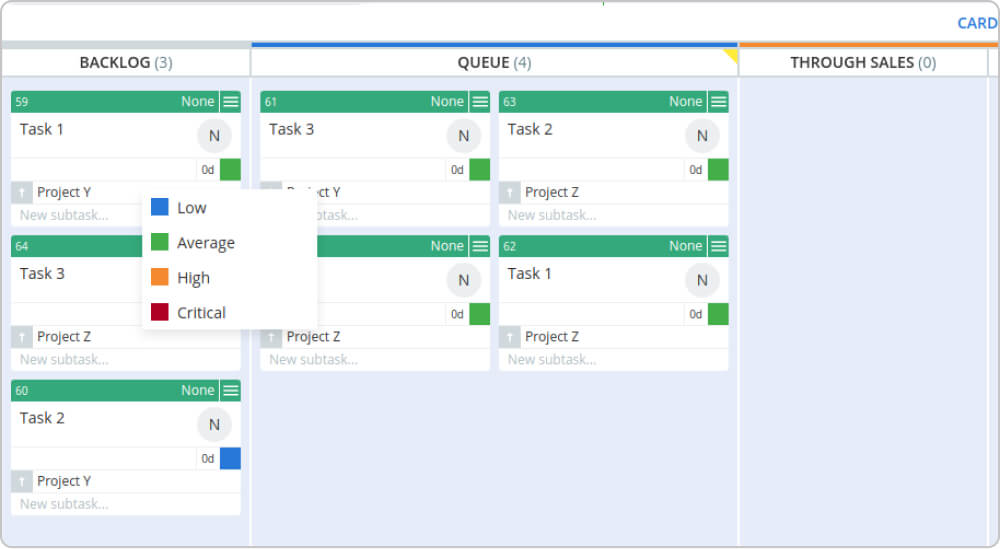 Following these six steps, you can now customize your board according to the needs of your work process (segment column, add swimlanes or workflows), visualize your projects and break them down to individual tasks. Additionally, you can support the stability of your workflow by applying WIP Limits and work prioritization.